Tuesday, October 28, 2014

Crossing Off Number 68

In 2005, I decided to make a life list.  It was a list of all sorts of things I'd love to experience in my life, from the completely realistic, to the probably not going to happen.

My approach to making the list was an absolutely no holds barred type of attitude.  It didn't matter whether the experience I added was do-able, realistic, practical, or reasonable.

The whole point of making the list was to not have any limits.  Just pure possibility.  Someone once told me that it was totally unrealistic and ridiculous.  I choose not to hear that!

So, my list includes things ranging from Walk on the Great Wall of China to Take a Painting Class.  There are all sorts of things that may or may not become a reality on my list...but last weekend's trip let me cross off number 68.  And what was number 68?  To see the northern lights!  I loooooove when I get to cross something off!  Because you know what crossing a number off means?  It means I experienced something new that I've wanted to do for almost 10 years.  Yes and yes.

Early, when they just started faintly appearing
If you're a frequent or occasional blog reader, you know that I've been slightly obsessed with seeing the northern lights since we moved here.  They do appear in Kodiak, but it's not very often, and I've managed to miss it every time it's come around.  So, I decided to take things into my own hands and go to where I could be almost guaranteed an aurora display.  Fairbanks!

The whole reason for our trip up to Fairbanks was to see the northern lights, and we checked out the area for the weekend and saw some fun sites, restaurants, and breweries.  Future blog posts to come about our Fairbanks adventure.

As for the northern lights, I would have liked a more sensational show than what we saw, but whatever - I'll take what I can get.  I know - now I'm getting greedy!  It was so very cool to see and I'm thrilled I finally got to experience it.  I got a new camera for my birthday & I made sure to get a tripod before our trip.  Amazingly, I was able to capture some shots of the aurora.

I say amazingly because I'm a total novice photographer.  We're talking still shooting mostly on auto and not exactly having a full understanding of the relationship between ISO, shutter speed, aperture, f-stops, etc.  I'm slowly learning, but I knew just enough to use a tripod and set the shutter speed as slow as I could to capture a few meager pictures of the show.  They came out decent for not having any idea what I was doing!


It was a camera learning experience, for sure.  Out of about 30 pictures, only around 10 of them came out.  The rest were just black.  That's how it goes when you're winging it (and don't have fancy professional equipment).  Considering the welcome booklet in our room had a section dedicated to tips for photographing the aurora, and the first line was this:  "PHOTOGRAPHING THE AURORA IS EXTREME PHOTOGRAPHY" - I'll take my scruffy shots as a total success in extreme photography for a first timer.


What was handy about our accommodations was that the room we stayed in at the B&B had a door out to a northward facing balcony, so we could stay out watching the sky for short periods, and then hunker down inside to warm up before going out again.  How perfect is that?  It was somewhere around 10 degrees outside, so it wasn't exactly comfortable hanging out on the balcony for long periods of time.  I have to say, the best way to view the aurora is when you have a bed you can go snuggle in for warmth every 5-10 minutes!

One of the compelling qualities of the aurora was how quickly it changed.  It would undulate from a hefty swath sweeping across the sky to a skinny line along the horizon, and then it would balloon back up to cover a sizable expanse of sky again.  It was such an incredible phenomenon to finally get to see in person.  And I'm seriously tickled that I managed to capture some photos of it!

Let's hear it for crossing off number 68.

Ta-ta for now.


Monday, October 20, 2014

Near Island

The Pugbull is more interested in chasing gulls and running around
like a nut than taking a picture with me
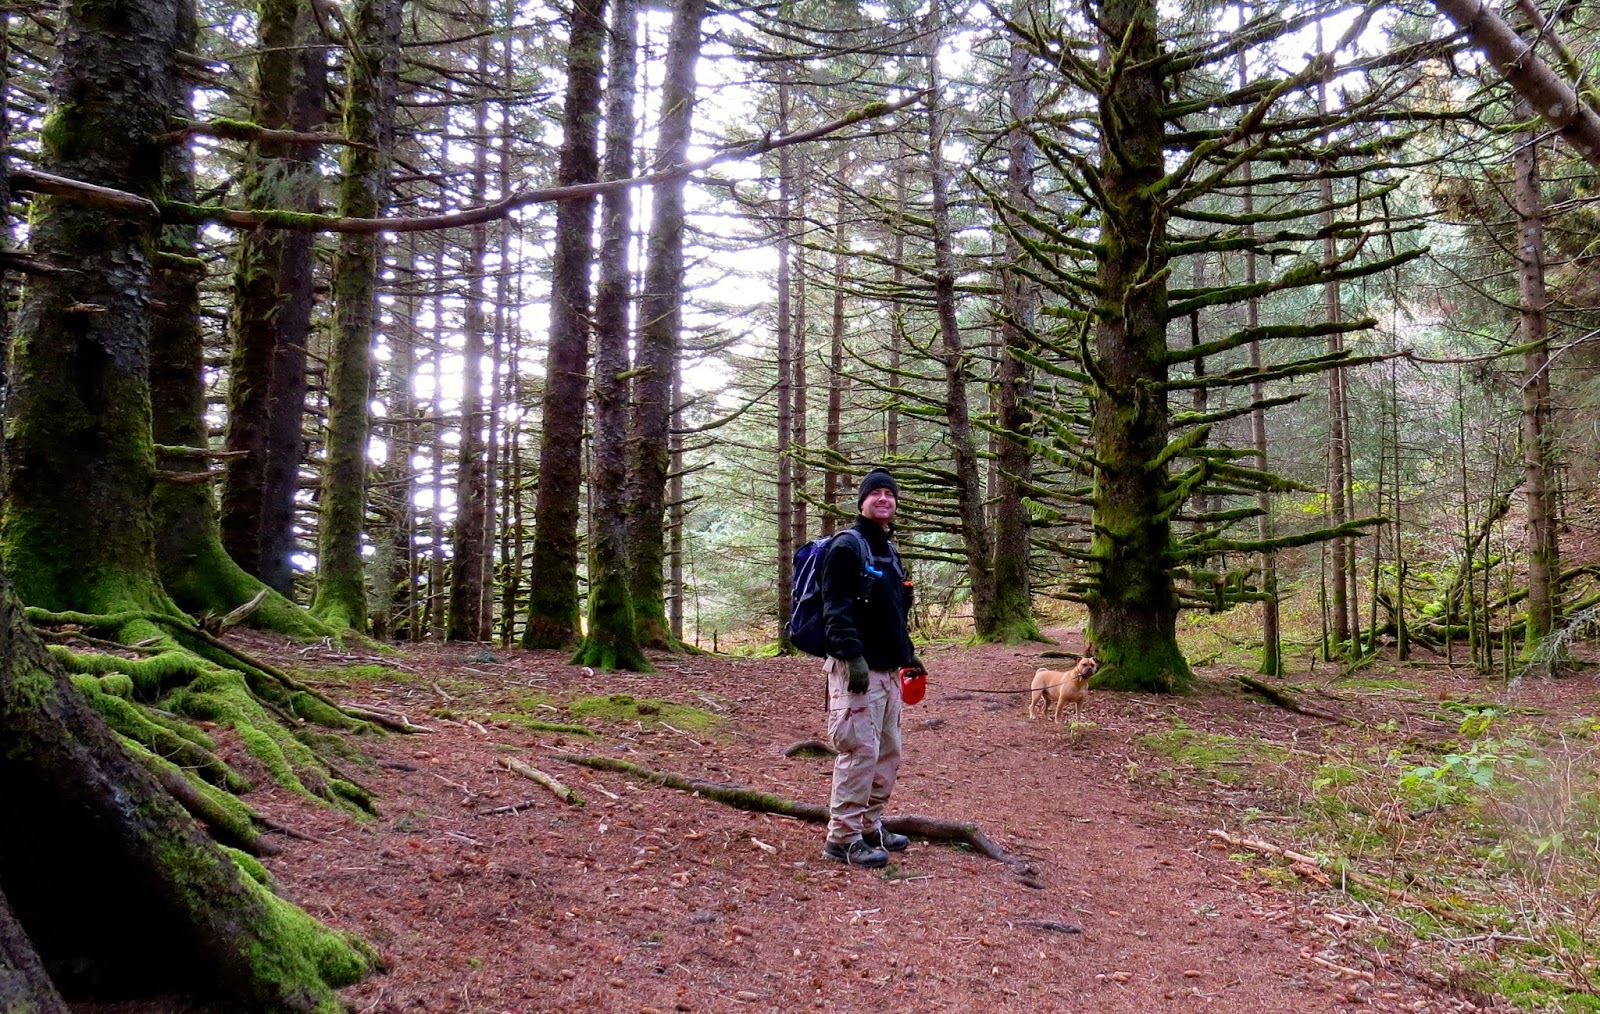
This is my favorite hike of the moment.  I'm sure that will change when another area strikes me as the new favorite.  But for now, the trails on Near Island are at the top of my arbitrary hiking flavor of the minute list.

Near Island is a short trip into town and a quick drive over a little bridge that stretches across the channel.  I guess that's why it's called Near Island - because it's close!  It has a good chunk of trails that take hikers through mossy, wooded paths that eventually jut out and hug the coastline. - Which is one of the reasons it's on the top of my list right now.

The views off of Kodiak are and will always be captivating.  No matter how many times I've seen them.  I can't tell you how often I gaze out at the view while I'm driving and think, "Would ya look at that."  There are just as many times I'm gazing out at the gray, drab skies and pondering how shitty the weather is too, but let's focus on the positive, shall we?

As we were tromping around, I started noticing what sounded like off road motor bikes or someone cutting down trees with a chainsaw.  It didn't take long to realize that what sounded like far away machinery of some kind was actually a huge colony of sea lions sunning themselves on an old dock not too far from where we were hiking.  It sounds weird, but that's exactly what those big mothers sound like when they bark and howl in unison. 

There were something like 50 sea lions right at the mouth of St. Herman Harbor, and they were so loud that we heard them before we saw them.

Check out that big one on the left.  Huge!

Look at all of them!  Are they not just big slugs, or what? 


I've been hoping to spot some sea lions out of the water for a while now.  Before this day, the handful I'd caught sight of were swimming. - Which is still impressive, but when you see them out of the water the enormity of their size is so much more prominent.  Definitely the highlight of our hike that day.  I can still hear them barking and making a racket!


Although, there is something to be said about the quiet, earthy stroll through the mossy forests...as I might have mentioned once or twice before in my ramblings about our Alaska experience.  The natural environment, the raw beauty?  Still not old.  And I don't think it ever will be.  No matter what hike is my flavor of the moment.

Ta-ta for now.


Sunday, October 12, 2014

Slow Cooker Jerk Pork

Old & busted on top and
new hotness on the bottom.  Giggity.
It was time.  The slow cooker that the hubby had loved and used for the last 15 or so years had given up the ghost.  Well, I shouldn't say that.  It still worked, only it had turned into this kind of situation:  (now this is where you imagine the slow cooker can talk)  Oh, did you want the high setting to actually mean high and cook the meal as it's supposed to?  I'm sorry, I'm not capable of that anymore.  My apologies on that less than tender beef stew I just turned out.
 
It was time to get rid of the old and busted.  Enter the new hotness.  I didn't do a whole lot of research into crock pots, but I did enough to learn that the model on sale at the Exchange was highly rated by the folks who do that type of thing.  So, the Hamilton Beach set it and forget it became our new crock pot.

The inaugural meal was a jerk pork recipe I found at slenderkitchen.com.  It turned out delicious.  As crock pot meals tend to go, it was pretty easy, too.  Not a whole lot to do once you throw everything in the pot.

The recipe called for chicken, but also recommended substituting pork if you're feeling it.  Since we had a pork loin in the freezer already, we went ahead and used that.

Here's the gist for the jerk sauce

I used my little Nutri-Bullet to whiz up all the ingredients for the jerk sauce.  It was super easy, and the scent of all those fresh ingredients was so fragrant once they were blended together.  I think next time I'll use more than just one jalapeno, though.  The finished meal could have used just a tiny bit more spice.  I ended up adding some crushed red pepper flakes to give it that extra kick of heat that it needed.

Ready to get zipped through the blender

Once everything was blended, it was just a matter of melding it all together and setting the slow cooker on low for 8 hours.  So yes, that meant I was pajama clad, chopping pepper and mincing ginger at about 9:30 in the morning.  But hey - I could be at work, right? I'll take experimenting with a new kitchen contraption and a new recipe over work any time.
About a half hour left till deliciousness

It didn't take long for the house to be inundated with the scents of jerk seasoning.  Not a bad melding of flavors to be wafting around throughout the day while I puttered around the house doing this and that.

This is a recipe that can easily be prepped the night before, and then tucked away in the crock pot before you leave for work in the morning.

It gets all happy while you're out and about for the day & you'll come home to a house that smells like a Jamaican haven of food love.  Is there anything better than coming home to the aromas of a home-cooked meal?  It counts as one of my favorite simple pleasures.  We served it over short grained brown rice & it was fabulous.  And now for one of my favorite parts...well, besides the eating it part.  The food porn picture:

Definitely recommend adding fresh pineapple in the last 30 minutes.  Makes it!

Damn good slow cooker meal!  And seeing as it's the start of hibernation time up here, this won't be the last of the crock pot dinners I tackle this fall and winter.   Which I'll more than likely be sharing here. Let's hear it for the new hotness slow cooker!

Ta-ta for now.


Saturday, October 4, 2014

Zombie Pumpkins

Halloween crafts this year are courtesy of the Queen, yet again.  That would be Martha.  Stewart, for those who don't immediately think of her when the words "craft" and "Martha" are used in the same sentence.  And who are those people, anyway?  Downright Un-American.  Just kidding.  I've had a rum cocktail & I'm feisty at the moment.

So, I'm fully in love with how my zombie pumpkins turned out.  Granted, they're not exactly menacing.  They're more whimsical and kind of cute. - Which is why I was compelled to add blood dripping from their maws.  I came up with a full back story for them, too.  See, they look all innocent and sweet with their happy, but also somewhat maniacal faces.  That's to lure you closer.  And that's when they strike and gnaw your face off.  Don't be fooled by the smile.  Those blood shot zombie eyes are of the UNDEAD.  Tread carefully.

So, this pumpkin craft was pretty straight forward and not hard to pull off.  The nice part about this project was that there wasn't any major carving, thereby avoiding the inevitable messy pumpkin guts that go hand in hand with jack-o-lantern type crafts. Then again, no toasted pumpkin seeds to snack on, either.  Booo.

My inspiration and step-by-step instructions can be found here, but I'll give you a run-down of what I did, too.  I used ping pong balls for the eyes, and you could also buy those chocolate eyeballs they sell this time of year. - But, I think it's more fun to DIY the eyes.

Plus, the chocolate eyes that were on sale at the Exchange were smaller than what I wanted.  I was going for big, bug-eyed pumpkins.  My supply list ended up being plain white ping pong balls, red and yellow craft paint, red and black sharpie markers, a red plastic bead to create the über red pupils, and a hot glue gun.

Here's the gist:  use a screw and the end of a pair of scissors to poke and widen a hole in the ping pong ball in order to recess the red bead a little bit, paint a yellow circle around the hole, and go to town with the black and red sharpies and red craft paint to make the eyes as zombie-like as you want them.  Once the ping pong balls are all painted up and dry, use a hot glue gun to attach the red bead inside the hole.  Voilà!  Zombie eyes.


I was digging making
the blood shot eyes.
So much fun to create!

As for cutting out the eyes on the pumpkin, I just estimated the size of the circle I would need and cut out the eye holes accordingly.  Once all the the paint and glue dried, I used the hot glue gun to secure the ping pong ball eyes into the eye socket holes I cut into the pumpkin. 

The mouth template on Martha's site is no longer active, so you kind of have to freestyle it.  Whatever your imagination envisions.  I penciled out a few mouth designs on a piece of paper that were similar to the picture of the sample pumpkins on her page. - That's kind of the look I was going for.

As the instructions say, I taped the template for the mouth onto the pumpkin, and used the tip of a screw to poke through all along the outline to transfer the design.  Then I carefully cut out the mouth and called it done.


It was a fun little Halloween craft!  Here are my finished Zombie Pumpkins, front and center on my little table in front of the house:


I love how the wider yellow eyes and tiny, jagged mouth make the one on the right look completely unstable. He'll eat you. - RAAAH! I almost want to go to town on the big one's mouth.  He needs to be more menacing.  Maybe I'll do a little reconstructive surgery on him.

If you're looking for a fun take on pumpkin decorating, this is a good one to give a shot!  You might also like the vampire pumpkins I did last Halloween.  Check them out here.  They're even easier than these zombie pumpkins. - No paint involved.  Here's to another season of all things harvesty.  And cheers to the Queen of all crafts.  And insider trading.  Just kidding - I love Martha!

Ta-ta for now.

BRAINS.